Getting the best of a new ROM for your rooted android phone

0 comments

Last year I made a post on making your newly rooted phone speedier. Well, I have just discovered an equally novel way of getting the best out of a new ROM, be it you are upgrading or installing the ROM for the first time.

Since this post will have loads of images, I will go straight to the crust. The whole idea behind this post is hinged on the fact that preserving data and system settings across ROMs makes the phone oftentimes perform less speedy than on the former ROM, even though you just did an upgrade. And that is what I discovered when I upgraded from CyanogenMod 6.0 to CyanogenMod 6.1, when I preserved the system settings the phone was annoyingly sluggish, but when I wiped the system settings (a factory reset) the phone was amazingly speedy. In (near) fact, the homescreen scrolls before I actually swipe! But in this post I will teach you how to factory reset your phone to get the best out of the new ROM and yet not lose a single system/user data, not even a last call record!

As is my usual (self-inconvenienting) habit, I will start from the basics.

STEP 1
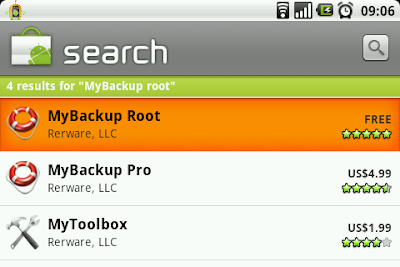
You are going to install two free softwares from the android market, they are Titanium Backup root and MyBackup Root.


STEP 2
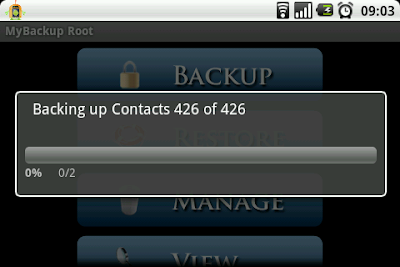
Run the MyBackup Root, follow the screenshots below. Don't bother backing up Applications and Media. Titanium will do the applications backup and as for your media, they are as safe as your SD card. Note that your phone must be rooted (if you don't know, then it isn't)


(Tick as many as all)


STEP 3
Run the Titanium Backup Root, again follow the screen shots below to backup all system and user apps including their data/settings.


(Press the Menu button to see the options above)


STEP 4
I'll assume that you already have the new ROM copied unto your SD card. So reboot into recovery (if you don't know how, just shutdown and when the phone is off, press the power button + home button). 
Do a Nandroid backup! (You will see the option on the first screen)
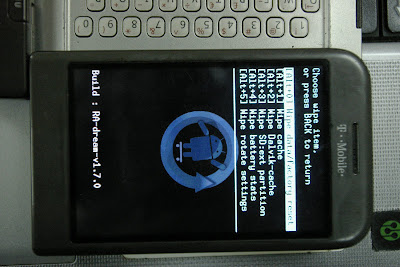
Follow the following screen shots to wipe the system and data settings, wipe cache and wipe dalvik cache. Wiping the  caches do not have any possible adverse effect on the phone, in fact it is recommended to wipe them often as it releases more system memory for better phone performance (removes junk data from system memory).

(Scroll to Wipe, which is the sixth option)
(Wipe data/system, reset)
(Wipe Cache)

(Wipe Dalvik cache)


(Flash the new ROM onto the phone)

STEP 5
Again, you will go through the android market to install Titanium Backup root. Then run it to install all your user apps that you had on the previous ROM (which are already backed up unto your SD card). As soon as you run the Titanium Backup Root, it automatically detects all the apps you backed up in the previous ROM. Just select those you want to install on the new ROM and restore the app + data (though one at a time). If you want to restore all, just go through the batch tool and Restore all apps with data.
Below are the screenshots, scroll down to see that for complete apps restore.


(Scroll to the app you wish to restore and touch it)


STEP 6
You must have (re)installed My Backup Root app, so run it and restore your phone data (contacts, call records, SMS, MMS etc).


STEP 7
Voila! Get yourself your favorite drink and explore your New ROM without carrying over any legacy settings. Enjoy what those developers spent hundreds of hours tweaking to tickle your fantasy!


Cliche: If you have any trouble getting by any of the steps, just hit me with a comment.

Vital Linux tips

0 comments

I remember the first time I installed Linux, I had never seen Linux on a system before, didn't want to use a virtual machine and I was going to install it on my new laptop. On top of all these, I downloaded Ubuntu 8.04 Alternate CD image, which has no live-booting feature or even a graphic user interface for the installation, everything was console configuration. I spent hours doing the installation, there were over 10 steps (I strongly think) and I knew less than nothing about ext, ext2, ext3, swap space, grub and root. I got terribly stuck at the mount point, swap file and home partition configuration, I wasn't allowed to get to the next step until I had tried nearly all the options. I was sweating inside and couldn't wait to finish and see if the laptop will recognize its power button. Fortunately, God answered my Jonah modelled prayer, the laptop responded when I pressed the power button. It spent so much time on the VAIO logo display, my heart did a short sprint. Finally, it moved on and into the Ubuntu and my feelings were so mixed I couldn't breathe steady. I was extremely happy I had installed a Linux OS and also miserable that I had wiped off my Windows Vista before making a recovery disc.

That was about 3 years ago, though it's not a long time but in computer world it's like half a century. I, definately, have moved ahead and even installed Linux (several distros) over 30 times on over 10 laptops (most probably). So in this post I will share with your two vital Linux tips, or should I say keyboard shortcuts that I have been overusing.


TIP 1
Arguably the best feature of Linux (for enthusiasts) is that you can can install tens of full feature softwares on a disk space size Windows will use to install just one of those softwares. Take me for instance, my Fedora is installed on a 4GB partition (inclusive of swap space and Home) and yet I run out of space on my 50GB Windows XP partition nearly every month without ever running out of space on my Fedora (please, don't take this literally). In the end I get to have all the applications I want on my Linux, so it is often a task (medium size one) to search out the the application I want to run. This is where the Tip 1 comes to the rescue.
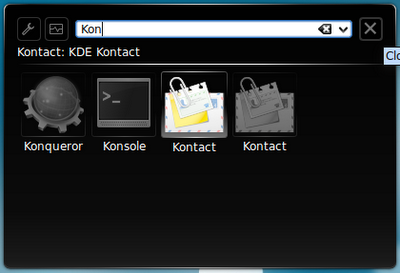
I just press the ALT and F2 key (on the keyboard) at the same time, then a small box come on screen and I type the name of the application I want to run. The best part of this is that it guesses the application as I provide the characters of the name, making it more than easy when I'm not sure of the application's name.


TIP 2
When we first get to know about Linux, we strongly believe it is all keyboard and blackscreen, no mouse pointer or GUI. Actually it used to be, and can still be (if you make it be). So the easiest (or cheapest) way to make it be is by installing a fancy GUI linux distro and booting into the dummy's galaxy of no more, then go further by using the key combination --


CTRL + ALT + F1


CTRL + ALT + F2


CTRL + ALT + F3


CTRL + ALT + F4


CTRL + ALT + F5


CTRL + ALT + F6


CTRL + ALT + F7


On some distros (like Fedora), the GUI is on F1 not F7.


Thanks for reading my blog, if you have any comment feel free to use the comment box. Have a great day.

Android's best kept secret code

0 comments

Just recently I noticed there was a flaky 3G service (MTN of course) in my room, but my phone seems too comfortable restricting me to the near useless EDGE service. I decided I was going to force my phone to use the 3G service, so armed with my computer, internet access and google, I searched for a way to do this and I was so resolute I won't mind porting a code meant for a USB modem. But to my utmost surprise, I ended up discovering a code (like those IMEI checking code *#06# or Nokia warranty code *#92702689#). This code is definetely android's best kept secret, the code takes you to a sort of troubleshooting settings screen. It is *#*#4636#*#* enter it on the dail screen and as you enter the last character * the phone will switch to a new screen, the Testing screen. The image below is a screen shot of what you'll see.


The Phone information section shows the IMEI number, phone number, service provider network, signal strength, roaming status and even button to run ping test amongst loads of other info. The best part of this section is that you can force the phone to use 3G service, 2G service or any available one with preference on either 3G or 2G! Just sroll down to the Set preferred network type and set the one you want, but it's advisable to set it to one that is compatible with your service provider. Don't set it to CDMA only when your service provider is GSM and don't set it too WCDMA (3G) only if you use your phone for heavy phone calls and not data like I do. So for me, anytime I want to do heavy data access activity, I just set it to WCDMA only, otherwise I leave it at the default of WCDMA preferred.


The other sections are Baterry Information, Battery history, Usage history and Wifi information. But apart from the battery information section that provides you information about the health of the phone battery, the other sections are of little interest in day to day use.

 
Follow me on Twitter | About me | Terms of Service | Privacy Policy